We've been redoing our bathroom for like the last month and a half that we've lived in this house. Tearing down the ugly-a** wallpaper took a good 2 weeks, then painting it a lovely shade of minty turquoise took a good 2 days. We finally got our new shower curtain hung up. There's still lots left to do, but maybe we'll finish it by the time we move out? Who knows. But with 3 of us using it, we needed a little organization with our personal items. We each have a drawer, but we needed a way to separate our toothbrushes and toothpastes while leaving them on the counter. So, I introduce to you my very ingenious idea of individual mason jar toothbrush holders:
 Just tape off a square (or you could use a stencil) with painters tape, then go to town with some chalkboard paint. It takes about 5 or 6 coats and you have to be SUPER careful about the paint dripping all over the place. I learned that the hard way. My roommates would be happy to know that I did this project outside on our patio, otherwise we might have a chalkboarded kitchen table. Oops.
Cost: approximately $25 (for me it was free, because my mom had extra mason jars laying around and I had that leftover chalkboard paint from when I had my chalkboard-crazy-phase. But you can get mason jars at Walmart for like $10 and the paint at Home Depot for about $15.)
Time: about an hour (plus drying time)
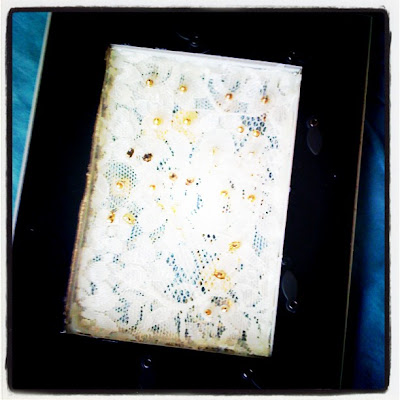
Second project: framed earring holder! Wish I could take credit for this idea, however it came from Pinterest, the biggest time-waster since Facebook. Get a frame, take out all the crap inside it (the cardboard, paper and glass) and cut off the part that keeps it all together that has the stand on it. Then get some lace fabric, trace the glass on it so you get the size correct, cut it out and hot glue it into the frame!
Tip 1: Use two layers of lace fabric - this will help hold your earrings on better.
Tip 2: Have someone help you hot glue the lace. Or injury could result. Just ask my fingers.

 Cost: approximately $10 (Frames are always half off at Hobby Lobby and you only need about a quarter of a yard of fabric. And then you need hot glue and a glue gun - but I didn't include that in the price.)
Time: about 45 minutes
Last up is a project that is still in the works, but I also got this idea from Pinterest. I'm making a print for our to-be-completed bathroom and I want it to be Oklahoma-themed. I want to get one of these printed on cardstock, matted and framed. I did mine in InDesign and it took less than 10 minutes. I just found a photo of Oklahoma on Google, traced it in Illustrator, filled it in, drew the heart and placed in InDesign. Easy.as.pie. If you don't have those programs and you like this idea, let me know and I can draw you your favorite state as well! :)
I'll keep you posted on how this actually turns out - it could be a dud, but I'm hoping it's not.

P.S. GAMEDAY is in 5 short days!!! Therefor, you can bet there will be a gameday attire post here in the next few days.
boomer sooner forever.

No comments:
Post a Comment